Showing posts with label decoration. Show all posts

Friday, February 10, 2012

Chocolate nut spread spider cupcakes

Through Google + I came across this picture. Children love to create and eat.  So while learning about nature, our environment or even holding different parties and celebrations such as Halloween or trick and treat times making these Chocolate Nut spread spider cupcakes is a treat treat.

Ingredients

  • 1 box of chocolate cake mix
  • 375 g [12 oz] bag of choc chips
  • 1 tsp cutter 
  • 1 bag pretzels,
  • 1 jar of chocolate nut spread - use your favourite.
  • chocolate sprinkles
  • red hot cake decorating marzipan [Smarties or M&M's are okay too]
  • 2 cups Cocoa Puffs
Method
  1. Prepare the work bench area.
  2. Make the 24 cup cakes and let them cool.
  3. While the cupcakes are cooling place a cover over another cooling rack [covered in waxed paper].
  4. Melt the chocolate  [either in double boiler method of microwave in a bowl for 30 seconds each burst until the chocolate is melted.
  5. Into the chocolate put the pretzels.
    1. Cover the pretzels well
    2. Remove pretzels and place on cooling rack.
    3. Sprinkle with chocolate sprinkles.
    4. Refrigerate these legs!
  6. When both the legs and the cupcakes are cool insert the legs into the cupcake.
    1. 4 on each side.
  7. Spoon 1/2 tsp of the Chocolate Nut spread onto the top of the cup cake.
    1. Chocolate or caramel frosting will do.
  8. Add red two eyes.
  9. Now add the cocoa puffs on the body


Similar posts
Strawberry Swirl Cupcakes
Cookie spiders
Spider bites

References


Encouraged to be written by Clear Vision Enterprises .. cve4me@gmail.com, twitter: cve4mejournal, LinkedIn : cve4me

Saturday, January 21, 2012

Martian Ears

Instructions


Method

  1. Use the  refrigerated Green Mint Biscuit biscuit dough log.
  2. Slice to 7 mm depth.
  3. Flatten the biscuit dough in your palm.\Gently place the cupped shape biscuit on aluminium foil.
  4. Shape the biscuit to resemble an aliens ear.
  5. Spray [or brush] butter on top of it.
  6. Sprinkle cinnamon sugar on top.
  7. Place in oven at 190 deg C [375 Deg F] 
  8. Cook until dry looking but just turning brown.


Similar Posts


Contact cve4me for ongoing reviews and updates.

References


Encouraged to be written by Clear Vision Enterprises .. cve4me@gmail.com, twitter: cve4mejournal, LinkedIn : cve4me

Thursday, January 19, 2012

Edible Trees


Yes this is a Christmas tree.  We have similar with fairy floss as mist around the trees that hangs off the branches [pretzels].

Ingredients:

  • Make  a green frosting  of at least 200 g in quantity.
    • or use 1 can per six cones.
  • Add a few drops of green food dye.
  • frost the bottom of the cone to the plate.
  • With the tips of your fingers holding down the cone to the plate ice the 'tree'.
  • Decorate with what ever is a hand or desired.


Similar Posts

  1. Palm Tree 

Contact cve4me for ongoing reviews and updates.

References

Encouraged to be written by Clear Vision Enterprises .. cve4me@gmail.com, twitter: cve4mejournal, LinkedIn : cve4me

Marshmallow ant

Ingredients

  • 3 large marshmallows
  • Nut spread [peanut butter, cashew butter...]
    • or a small dab of frosting
  • 2 raisins or M & M's.
  • 4 pretzel sticks - broken into thirds.


Method

  1. Using three [per side] of the broken pieces of stick stab these into the body part of one marshmallow.
  2. On a head part place an antennae and a jaw both sides of the face marshmallow.
  3. Link the head to the body and the body to the tail of the ant.
  4. With nut spread or frosting dab to either the raisins or the M & M's to the head marshmallow.

Similar Posts
  1. Bugs on a log.
  2. Spider Bites
  3. Maggot Stew
  4. Lady Bugs

Contact cve4me for ongoing reviews and updates.

References

Encouraged to be written by Clear Vision Enterprises .. cve4me@gmail.com, twitter: cve4mejournal, LinkedIn : cve4me

Wednesday, January 18, 2012

Little Butterfly Cup Cakes.


Ingredients

  • 12  pre-made cup cakes [choose your flavour].
  • Pink frosting
  • Hundreds and thousands.
  • 24 marzipan heart shapes.
  • 24 antennae
  • 12 gum drop sweets

Method

  1. Prepare your work area first.
  2. Frost the cupcakes.
  3. Place the hearts in position for the wings.
  4. Add antennae's.
  5. Pop into the middle of the heart the Gum Drop.
  6. Sprinkle with a little of the Hundreds and thousands.


Similar Posts

  1. Strawberry Swirl Cup Cakes
  2. Gluten Free Choc Chip Cupcakes
  3. Milky Way

Contact cve4me for ongoing reviews and updates.

References


Sweet Sensations

Encouraged to be written by Clear Vision Enterprises .. cve4me@gmail.com, twitter: cve4mejournal, LinkedIn : cve4me

Heart Necklace Valentine Cookies.

Add a string or bow and there
 you have an edible bracelet.
makes about 30 heart shapes.

Ingredients

  • 1 cup butter - softened / margarine.
  • 3/4 cup white sugar
  • 1 egg
  • 1 tsp vanilla exxence
  • 1 tbsp lemon zest
  •  2   1/2 cups self raising flour -sifted.
  • 1 tsp baking powder
  • 3 drops of red food colouring or beetroot juice.
  •  70 gr [2  1/4 oz] candy sprinkles [ cake decorating marzipan decorations]
  • 60 red licorice pieces - in vines for tying.
Method

  1. Cream 1 cup butter  and 3/4 cup white sugar together.
  2. Blend in the egg, 1 tsp vanilla essence and lemon zest.
  3. Sift together 2  1/2 cups of self raising flour and baking powder into another bowl.
  4. Add to the creamed mixture and blend well.
  5. Cover and refrigerate for 2 hours.
  6. Prepare the work bench area.
  7. Preheat the oven to 190 deg C [375 deg F]
  8. Lightly flour the rolling area.
  9. Roll out the dough to7mm [1/4 in]
    1. Note if the weather is extremely hot when making these Valentine Cookies then take from the fridge 1/3rd of the dough at a time.
  10. With the heart shaped dough cutters flour them lightly before using them to cut.
    1. You'll need both a 2.5 and a 5 cm [1 and 2 inch] cutter.
  11. Cut out the dough.
  12. Place cut out dough on a paper lined tray.
  13. Use a straw to press a ring in the top of the heart shape.
  14. Bake for 5 to 7 minutes.  
  15. Cool on wire rack.

Now for the decorating

  1. Stir in the colouring .
  2. On the cool cookies spread the frosting.
  3. Decorate the top of the frosting
  4. Use a toothpick to dislodge the 'hole'.
  5. Thread the licorice into the hole and tie.


Similar Posts
  1. Heart shaped bread bun
  2. Gingerbread Valentines
  3. Heart shaped candy coated heart
  4. Peppermint Creams

Contact cve4me for ongoing reviews and updates.

References
Cackleberries

Altered by Clear Vision Enterprises .. cve4me@gmail.com, twitter: cve4mejournal, LinkedIn : cve4me

Marshmallow Dip Sticks

Ingredients

Easy to make... fast to eat.
  • 2 cups chocolate chips
  • 1 cup peanut butter, cashew butter or other nut spread
  • 300 g [10 oz] bag marshmallows
  • chocolate sprinkles
  • pretzel sticks
  • waxed paper
Method

  1. Set up the work bench.
    1. If thee are a team of smaller helpers then set the bowls of pretzels, marshmallows, nut paste, melted chocolate and sprinkles far enough apart for ease of movement between each person. 
      1. By the way with helpers forget the waxed paper.
  2. Insert pretzel sticks into the marshmallows.
    1. about 3/4 down into the Marshmallow.
  3. Dip the top of the Marshmallow into the nut butter.
  4. Set aside on the waxed paper.
  5. Melt the Chocolate chips in a microwave, stove top or double boiler.
  6. Dip peanut butter end of the marshmallow into the chocolate.
  7. Immediately dip the chocolate end into chocolate sprinkles.
  8. Place on waxed paper.


Similar Posts

  1. Raisin and Nut spread

Contact cve4me for ongoing reviews and updates.


References
Family Corner


Altered by Clear Vision Enterprises .. cve4me@gmail.com, twitter: cve4mejournal, LinkedIn : cve4me

Spider Bites

Cute as this spider is eating him could be a culinary transformation.

Ingredients
Per person
  • 1 x mini Babybel cheese.
  • 4 small Pretzel Sticks
  • 2 raisins
Method.

  1. Unwrap all the cheeses.
  2. Make two tiny slits in the top of the Cheese's.
  3. Place one of the 2 allocated raisins in each slit.
  4. Now halve the pretzels sticks.
  5. Place 4 of these halves along each side of the Babybel cheese.


Similar Posts


Contact cve4me for ongoing reviews and updates.

References
Recipe originally published in Wondertime magazine.
Kaboose


Altered by Clear Vision Enterprises .. cve4me@gmail.com, twitter: cve4mejournal, LinkedIn : cve4me

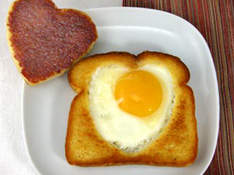
Heart in the hole eggs and toast

Simple to do but much appreciated.
Sometimes its having a combination of creatively and desperation that enables really simple ideas to come forward.  The amount of team work is levelled at the child's ability level.

Ingredients

  • 1 tsp butter or margarine.
  • 1 slice of bread
  • 1 egg.

Method

  1. Prepare the work area.
  2. Using a 8 cm [3 inch] heart shaped cutter cut out a heart in the slice of bread.
    1. Centre usually works best.
  3. Crack an egg into a small cup and set this aside.
  4. Heat the butter or margarine in a fry pan.
  5. Place both pieces of the bread into the fry pan.
  6. Cook about two minutes on the first of the sides.
  7. Turn both pieces over.
  8. Place the egg into the heart shaped hole .
  9. Some people like their eggs over easy. If this is the case for you then add the egg when you are cooking the flip side of the bread.  Should you want the egg cooked thoroughly then add the egg when you are cooking the first side.  Choice is yours.
  10. I like to present this with the cut out shape on top of the heart shaped egg.


Similar Posts


Contact cve4me for ongoing reviews and updates.

References
Kabose.com

Altered by Clear Vision Enterprises .. cve4me@gmail.com, twitter: cve4mejournal, LinkedIn : cve4me

Gingerbread Valentines

To make these Gingerbread Valentines use the already prepare dough to the point of cutting the shapes out.

Ingredients

  • Template pattern of each child's hand.
  • 1 pack of red hot candies
  • Cake decorating silver or gold balls
  • M & Ms
Method
  1. Place the paper hands on the dough.
  2. Cut around the template hand print.
  3. Place the greased cookie sheet on the baking tray.
  4. Let the children decorate their own hands
    1. say the red hot candies for the finger nails, silver balls for the rings, M & Ms for bigger decrative jewels.
  5. Bake at 190 deg C [375 deg F] for 6 to 8 minutes.
  6. Cool on wire rack.
This recipe makes about 14 small Gingerbread Valentine hands 


Similar Posts

  1. Ginger Bread
  2. Heart Shaped Valentine Cookies

Contact cve4me for ongoing reviews and updates.

References

Encouraged to be written by Clear Vision Enterprises .. cve4me@gmail.com, twitter: cve4mejournal, LinkedIn : cve4me

Tuesday, January 17, 2012

Watermelon cookies

This one is the watermelon.
Other colours for other fruits

Ingredients

  • 2 cups of self raising flour [all purpose]
  • 1 and a 1/2 tsp baking powder
  • 1/2 tsp salt
  • 1/3 cup butter
  • 1/2 cup shortening
  • 3/4 cup sugar
  • 1 egg
  • 1 tbsp milk
  • 1 tsp vanilla essence
  • 3 drop of red food colouring or beetroot juice
Method
  1. Combine the flour, baking powder and salt into a small bowl.
  2. Beat the butter and shortening until light and fluffy.
  3. Gradually add the sugar while beating this well in.
  4. Stir in the egg, milk and vanilla.
  5. Gradually add the flour mixture to the creamed mixture.
  6. Mix well.
  7. Add a small amount of either food colouring or beetroot juice.
  8. Beat til blended.
  9. Shape the dough into a ball.
  10. Cover.
  11. Chill for three hours.
  12. Preheat over to 190 deg C [375 Deg F]
  13. Divide the dough in half keeping one portion in the fridge.
  14. Roll the first portion out to 5 mm [1/4 inch].
    1. Use a lightly floured board or the mixture becomes unusable.
  15. Cut the dough with 8 cm [3 inch] round cookie cutter. 
    1. then cut each circular piece in half.
  16. Place on ungreased cooking sheet.
  17. Press several chocolate chips into each cookie.  
  18. Repeat the process.
  19. When cooked and cooled then ice or add the frosting by dipping the outside of the circular edge into the frosting and move it around to the other edge.
  20. Place the watermelon biscuit on a baking sheet until frosting is hard.


Similar Posts

  1. Juicing the watermelon
  2. Zappy Watermelon Cooler
  3. Watermelon Salad with Feta and Mint
  4. Frosting recipe

Contact cve4me for ongoing reviews and updates.

References
Encouraged to be written by Clear Vision Enterprises .. cve4me@gmail.com, twitter: cve4mejournal, LinkedIn : cve4me
Message on a biscuit

Simple steps great learning make.

Part of the fun with food is that the preparation  all about messages. Even young children enjoy making simple messages look creative when dealing with their emotions.

Try these and see what I mean.

Ingredients
Per child you will need
  • Either a Graham cracker or Marie biscuit.
  • Pink icing or frosting [ white icing sugar or frosting with a little red added.  Little = very little]
  • Little cake decoration balls.
  • Alpha Bits or cake decoration hearts.
Method
  1. Frost or ice the biscuits
  2. Using the cake decoration balls write a message [try I love you, happy birthday, Merry Christmas or even be my Valentine]
  3. Now decorate the edges with hearts or candle.  What ever the occasion warrants that you have the cake decoration bits for.


Similar Posts

  1. Funny Face biscuits
  2. Why create an edible face
  3. Fudge frosting

Contact cve4me for ongoing reviews and updates.

References

Monday, January 16, 2012

Heart shaped pancakes

Ingredients

  • Pancake mix- already made up and filled into a squeeze bottle.
Method

  1. Heat the fry pan that the pancakes are to be cooked in.
  2. When the butter or marge is sizzling then turn the squeeze bottle upside down and quickly direct the pancake mix into a heart shape.
  3. Cook the heart shaped pancake. 
  4. Turn the pancake over.
  5. Once cooked carefully lift out of the pan and onto a plate.
  6. Allow to cool.
  7. Top with a squirt of canned whipped cream


Similar Posts

  1. Chicken Pox Pancakes
  2. Green pancakes and cream cheese
  3. Basic waffle recipe

Contact cve4me for ongoing reviews and updates.

References


Encouraged to be written by Clear Vision Enterprises .. cve4me@gmail.com, twitter: cve4mejournal, LinkedIn : cve4me

Chocolate dipped fruit

Microwaving the chocolate is a lot easier than double boiler method when there are plenty of children around.
The main thing to be weary of is overdoing the melting process.


Ingredients

  • 400 grams [14.5 oz] bag of dried fruit pieces
    •  These may be in the form of Dried mango, peach, guava, pineapple, apple or even banana chips.
  • about 1/3 rd a cup of dark chocolate drops.
  • about 1/3rd a cup of white chocolate drops.
Method


  1. Cover the work area first.  Lay down some grease proof paper.
  2. Into a microwave bowl place the white or brown chocolate pieces
  3. Melt the chocolate for 30 seconds .
  4. Stir.
  5. Melt again.
  6. Stir...
  7. When the Chocolate has melted enough dip the fruit pieces into the chocolate.
    1. Best done with a small pair of tongs or the children's fingers may find the chocolate hot to touch.
  8. Lay each piece of fruit out onto the wax paper.
  9. Allow to set.
  10. Use cellophane to wrap each piece up with.
  11. Place each piece into what ever you are going to use as a gift basket.


Similar Posts


Contact cve4me for ongoing reviews and updates.

References

Encouraged to be written by Clear Vision Enterprises .. cve4me@gmail.com, twitter: cve4mejournal, LinkedIn : cve4me

Marshmallow bunnies


A few years ago a friend made some children I know bunnies similar to these.    The children enjoyed receiving them. A major challenge with these bunnies was to then get the children eating them.  Most thought that they wanted to save them for later. Sometimes they actually got the bunnies home.  Other times there was no way that was going to happen.

Ingredients

  • Marshmallows.
  • Scissors
  • Tooth pick
  • Food Colouring
  • A little icing sugar if needed.
Method


  1. Hold the marshmallow in your fingers so that while you are using the scissors the Marshmallow will have less chance of moving.
  2. To make the ears:
    1. Using the scissors make a diagonal cut towards the rim edge of the Marshmallow .
    2. Stop before you get too near the top end of the Marshmallow.
    3. Gently lift the corner that you have snipped.
    4. Now snip along the middle of this piece. 
    5. Rub a little of icing sugar between your fingers.
    6. Separate the ears and angle them both outwards.
  3. To make the tail.
    1. Starting at the point of the first cut you made for the ears.
    2. Snip down towards the back [away from the face direction] until you are about half way down the back of the Marshmallow. 
    3. Pinch the end of this segment so that a cute little tail is made.
  4. For the bunnies face [ and feet]
    1. Starting about midway between the face and the where the front feet will be - snip about 0.7 cm [1/4 inch] towards the middle /bottom part of the body.
    2. The upper side of the cut has become the lower jaw line of the face.
    3. Snip the flap of the marshmallow in half. 
      1. There are you two front feet.
  5. Using a toothpick and a little food colouring - dip the end of the tooth pick into the dye.
    1.  'Paint' a face on the bunny.

Similar Posts


Contact cve4me for ongoing reviews and updates.

References


Fluffier Bunnies

Altered by Clear Vision Enterprises .. cve4me@gmail.com, twitter: cve4mejournal, LinkedIn : cve4me

The bugs that bite

Ingredients

  • Snow balls
  • 1 lollipop
  • two licorice twist sticks.
  • 2 mini M&Ms
  • Dab of white icing
Method
  1. Set out the plate the Love Bugs are going to go on first.
  2. Mix up the icing sugar.
  3. Cut the licorice twists in half.
  4. Place the twist sticks into the Marshmallow puffs.  Two per puff.
  5. Unwrap the lolly pop and vertically place the stick end into the head area -like it is an antenna.
  6. With a careful hand cover the back of the M&M [eyes] with some icing sugar mix.  Now place the eyes onto the marshmallow.
There you have a rather fetching Love Bug for Valentines day.  However different colours of coconut and the same bug can take on a Halloween look even.


Similar Posts

  1. Lady Bugs
  2. Maggot Stew
  3. Butterfly cup cakes

Contact cve4me for ongoing reviews and updates.

References
Altered from Ramblings of a crazy women


 cve4me@gmail.com, twitter: cve4mejournal, LinkedIn : cve4me

Monday, August 15, 2011

Orange Worms

Ingredients And Procedures
Ingredients
2cansapricot halves, packed light syrup
4envelopesunflavored gelatin
2cuporange juice

Directions:


  1. Wiggle these worms any way you want on your plate. 
    1. If you like, give them 'eyes' made from licorice bits.
  2. Place apricots in colander and let drain. Place drained apricots in food processor, cover, and whirl until well blended.
  3. Place gelatin in 2  ltr [3 quart] pan, add orange juice, and let stand for 5 minutes to soften gelatin.
  4. Place pan on burner and bring to a boil over medium-high heat, stirring with whisk.
  5. Turn off burner and remove pan to rack. 
  6. Add apricots and mix with whisk until well blended.
  7. Pour into baking pan,cover with plastic wrap, and refrigerate for about 4 hours, until set.
  8. Use butter knife to cut gelatin crosswise into 23 cm x 2.5 cm [9 inch long x 1 inch wide] strips. (you should have about 13 strips)
  9. Use pancake turner to remove strips to serving plate. 
  10. Use your hands to twist strips into worm shapes.


Makes 13 worms.


Similar posts
Marshmallow ants
Spider Bites
Maggot Stew

Copied by Clear Vision Enterprises .. cve4me@gmail.com, twitter: cve4mejournal, LinkedIn : cve4me

Reference Orange Worms

Friday, August 12, 2011

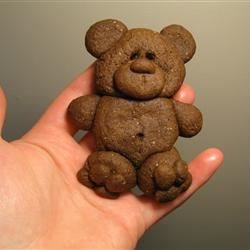
Cinnamon Teddy Bears


Ingredients

  • Teddy Bear Biscuits Recipe
  • 1 mix of  buttermilk biscuits
  • 2 tablespoons sugar
  • 1 egg, beaten
  • 1/4 teaspoon ground cinnamon
  • 9 miniature semisweet chocolate chips

Directions

  1. For each bear, shape one biscuit into an oval for the body and place on a greased baking sheet.
  2.  Cut one biscuit into four pieces; shape into balls for arms and legs. 
  3. Place next to body.
  4.  Cut one biscuit into two small pieces and one large pieces; shape into head and ears and place above body. 
  5. Brush with egg.
  6.  Combine sugar and cinnamon; sprinkle over bears. 
  7. Bake at 425 degrees F for 8-10 minutes (the one remaining biscuit can be baked with the bears).
  8.  Place chocolate chips on head for eyes and nose while the biscuits are still warm.


Encouraged to be written by Clear Vision Enterprises .. cve4me@gmail.com, twitter: cve4mejournal, LinkedIn : cve4me

Teddy Bear Biscuits

Ingredients:

  • 250g unsalted butter - at room temperature, chopped.
  • 1 cup caster sugar
  • 2 eggs
  • 2/3 cup desiccated coconut
  • 3 cup self-raising flour
  • 2 tbsp cocoa power, sifted
  • 1/4 cup dark chocolate melts, melted
  • Mini M&M's to decorate with.
Directions
  1. Beat butter and sugar until light and fluffy.
  2. Add eggs 
    1.  one at a time- 
    2. beat until combined.
  3. Stir in coconut and flour to form a smooth dough.
  4. Divide dough in half.
  5. Add chocolate powder to one half of the dough mixture..
    1. knead until chocolate is mixed through.
  6. To make bear heads 
    1. roll 14 level tbsp of chocolate dough into balls.
    2. place 6 cm apart on the oven trays.
    3. Using your hands gently push the heads sown to flatten the balls slightly.
  7. To make bear bodies 
    1. Press down gently to flatten bodies.Chocolate Teddy Bear Cookies
    2. roll 14 level tbap of chocolate dough into balls.
    3. Place against heads.
  8. To make arms and legs
    1. Roll 56 level tsp into balls.
    2. Place against bodies.
    3. press to flatten slightly.
  9. To make ears
    1. Roll 28 level tsp into balls.
    2. Place against he head .
  10. Cook biscuits one tray at the time.
    1. moderate oven [180 deg Cel] for about 15 to 20 minutes.
  11. Cool bears on tray.
  12. Decorate
    1. Pour dark chocolate into a small snap lock bag.
      1. squeeze into one courner, twist bag and make a small snip.
      2. Attach mini M&M's with melted chocolate to represent the eyes.
      3. Pipe on choclate nose and mout.
  13. Put aside to set.
  14. Biscuits can be made up to three days before ifr they are stored in an air tight container.


Encouraged to be written by Clear Vision Enterprises .. cve4me@gmail.com, twitter: cve4mejournal, LinkedIn : cve4me