Showing posts with label level 2. Show all posts

Thursday, January 19, 2012

Heart felt apple pies


Ingredients

  • 4 pastry sheets
  • 1 x 400g can of apple pieces [for cooking]
  • Dash of cinnamon or nutmeg mixed with a little sugar.
  • a little milk or water.
Method


  1. Prepare the work area first.
  2. Preheat the oven to 220 Deg C [ 425 deg F].
  3. Spray the baking sheet or cooking tray.
  4. Mix the cinnamon / nutmeg and sugar into the apple mix.
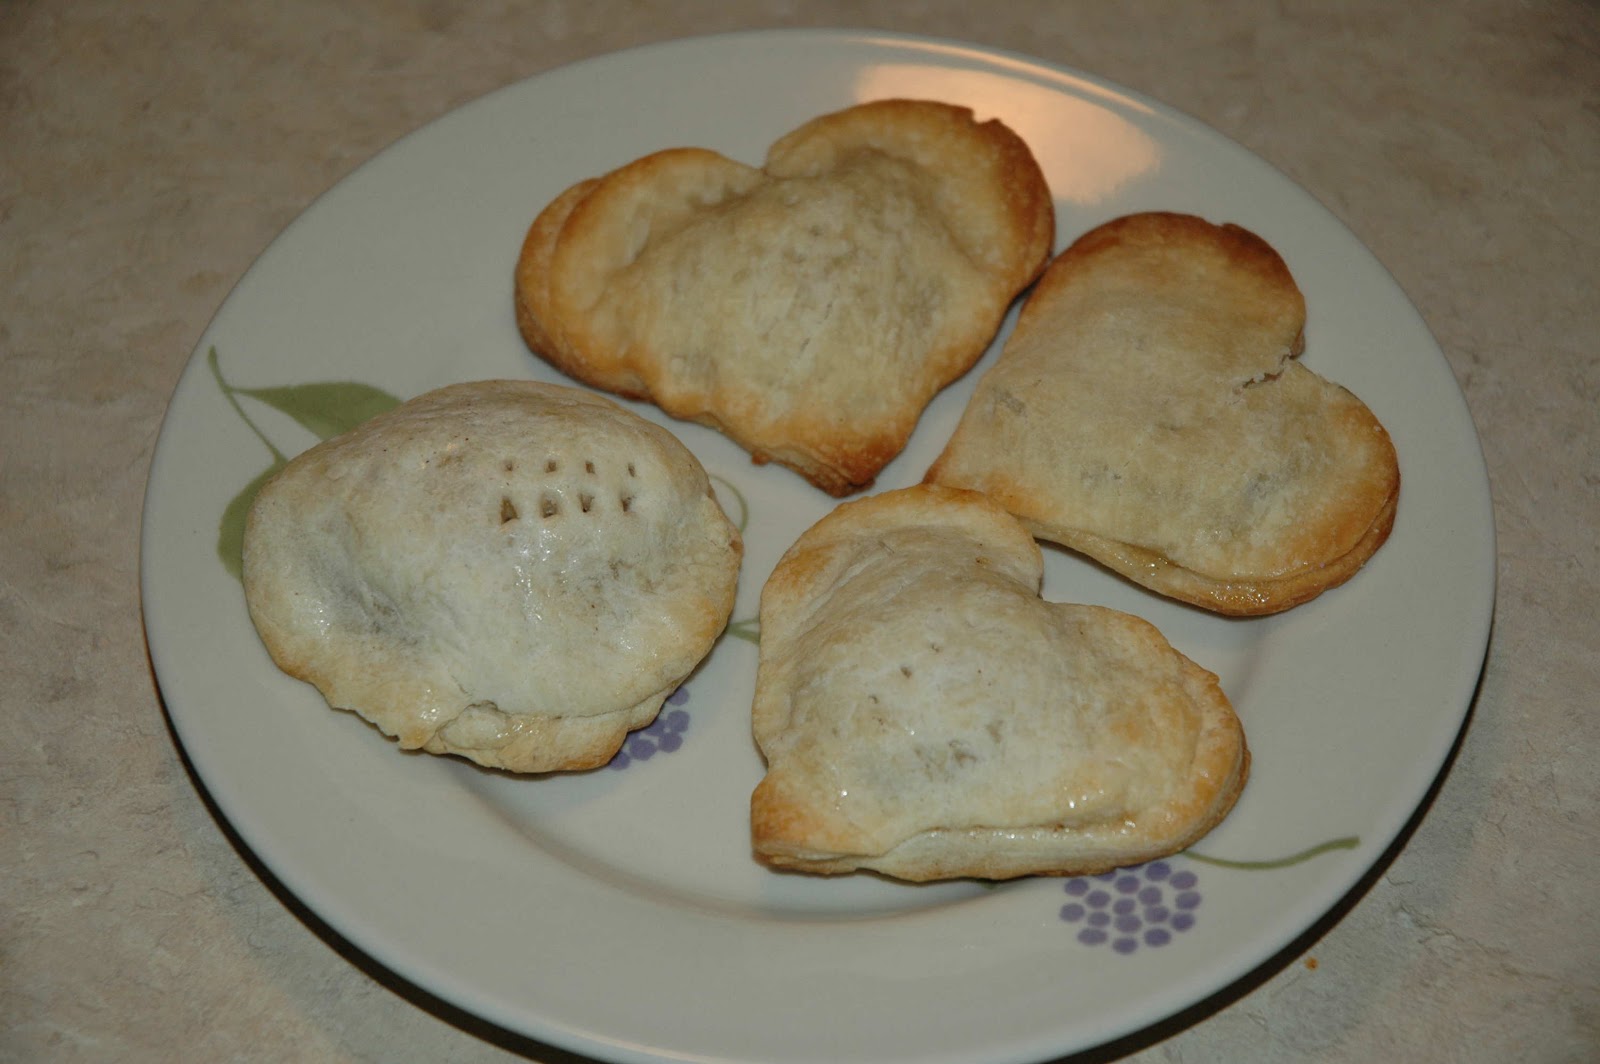
  5. For each apple pie two pieces of heart shaped pastry cut out are used.
  6. On the base one place 1 to 2 tbsp of apple mix.
  7. around the edges run a finger that has the milk or water on it slightly dampening the outside edge.
  8. place the upper pastry over the top of the apple.
  9. Press the edges of the top and bottom pastry pieces together.
  10. Use a fork to crinkle press the edges together  as well as to make a couple of holes in the top.
    1. allows the steam to escape.
  11. Bake for 10 to fifteen minutes - or until golden brown.
  12. Allow to cool before biting into these pies.


Similar Posts

  1. Spiced Apple Juice
  2. Baked apples with mint
  3. Cut out the heart shape

Contact cve4me for ongoing reviews and updates.

References
Valentine Apple Pies


Altered  by Clear Vision Enterprises .. cve4me@gmail.com, twitter: cve4mejournal, LinkedIn : cve4me

Wednesday, January 18, 2012

Upside down Ugly cake

Ingredients
  • 2 cups mini-marshmallows
  • 1 cup brown sugar
  • 1 chocolate cake mix
  • 1/2 cup cocoa
  • 2 cups hot water
Method


  1. Prepare work space.
  2. Preheat oven to 180 deg C [350 deg F].
  3. Mix up the cake mix to the box instructions.
    1. or make a basic chocolate cake mix.
  4. Now put in the Marshmallows, brown sugar, cocoa and water into a separate bowl.
  5. Pour into a greased 23 cm x 33 cm [ 9inch x 13 inch] pan.
  6. Spoon cake mix on top of the marshmallow mixture.
  7. Do not mix the mixes together.
  8. Bake for 45 minutes.
  9. Cool.
  10. Flip over the tin.  Take care as the marshmallow mix will probably run.


Similar Posts


Contact cve4me for ongoing reviews and updates.

References

Encouraged to be written by Clear Vision Enterprises .. cve4me@gmail.com, twitter: cve4mejournal, LinkedIn : cve4me

Chocolate Marshmallow Slices


Ingrediants
  • 1/2 cup butter margarine
  • 1 pk. [375 g or 12 oz] chocolate buds [roughly 2 cups]
  • 1 pkt miniature marshmallows [330 g or 10 .5 oz] - coloured or plain.
  •  1 cup finely chopped nuts
  • Additional nuts
Methods
  1. melt the butter and chocolate buds over a low heat.
  2. Stir constantly until blended.
  3. remove from the heat.
  4. Cool 5 minutes.
  5. Stir in the Marshmallows and 1 cup of chopped nuts.
    1. Do not allow the marshmallows to melt.
  6. Tip the mix out onto waxed paper.
  7. Form 2 rolls [ careful this is hot]
  8. Wrap in foil.
  9. Refrigerate for 20 minutes.
  10. Remove from fridge and coat with with extra nuts.
  11. Cut rolls into 1 cm slices.


Similar Posts


Contact cve4me for ongoing reviews and updates.

References

Encouraged to be written by Clear Vision Enterprises .. cve4me@gmail.com, twitter: cve4mejournal, LinkedIn : cve4me

Dirt cup and friends

Ingredients

  • 2 cups of cold milk
  • 1 pack [4 serving size] of instant pudding that is chocolate flavour.]3  and a half [ 8 oz or 250g] whipped topping, thawed.
  • 1 pack plain Marie Biscuits [500g or 16 oz] - May also be chocolate biscuits if desired.
  • Gummy worms, insects, snakes


Method

  1. Set up the work bench area.
  2. Make the instant pudding by beating the milk and the pudding mix together.
  3. Let the pudding stand for five minutes in the fridge.
  4. With a rubber scraper very gently stir whipped topping and 1/2 of the crushed biscuits into the instant pudding mix.
  5. Place 1 tsp of the remaining crushed cookies into the bottom of one of the 8 cups.
  6. Fill the cups up to 3/4 full with the instant pudding mix.
  7. Now use the rest of the crushed cookies /biscuits to fill up the cups.
  8. Add the gummy worms as a decoration.
  9. Place the cups into the refrigerator so that the dirt cups are thoroughly chilled - for 1 hour.


Similar Posts

  1. Dirt Cup Cake

Contact cve4me for ongoing reviews and updates.

References
Kaboose.com

Encouraged to be written by Clear Vision Enterprises .. cve4me@gmail.com, twitter: cve4mejournal, LinkedIn : cve4me

Valentines Kisses

Makes 4 to 6

Ingredients

  • 6 cups Rice Bubbles
  • 1 pk 250gr marshmallows
  • 3 tbs Margarine
  • Vegetable cooking spray

Method

  1. Prepare the work area.
  2. Follow a Rice Bubble Treats recipe.
    1. The Rice Bubble Treats made with Marshmallows recipe until step number seven [7]
  3. Cool the mixture down until it is warm enough to handle.
  4. Meanwhile spray the inside of your funnels.
  5. Break off some of the main Rice Bubble Mix.
  6. Mold the mix into the inside of the funnel. 
  7. Slide out of the funnel [keep the ^ shape] onto the waxed paper..
  8. Respray the funnel if needed and repeat the shaping process.
  9. Cool the shaped Rice Bubble treat completely.
  10. Meanwhile get the children to write a simple I love you message for Valentines Day, or a Happy Birthday, or even Happy Mothers Day message
  11. Wrap as a gift in Aluminium foil.


Similar Posts

  1. Rice Bubble Treats made with Marshmallows
  2. Honey Joys

Contact cve4me for ongoing reviews and updates.

References

Children's fun

Encouraged to be written by Clear Vision Enterprises .. cve4me@gmail.com, twitter: cve4mejournal, LinkedIn : cve4me

Tuesday, January 17, 2012

Pasta Hearts of Love

Ingredients

  • Several packets of heart shaped pasta.
  • Water as per instructions on the packet.
  • A small dab of oil or margarine
  • Parmesan Cheese - grated.

Method


  1. Cook pasta as per the instructions on the packet.
  2. Cool slightly.
  3. Toss in the Parmessan Cheese.
  4. Let the cheese melt.
  5. Serve with a light salad.


Similar Posts

  1. Salad Dressing 
  2. Parsley and Mint Salad

Contact cve4me for ongoing reviews and updates.


References

Encouraged to be written by Clear Vision Enterprises .. cve4me@gmail.com, twitter: cve4mejournal, LinkedIn : cve4me

Monday, January 16, 2012

Chocolate dipped fruit

Microwaving the chocolate is a lot easier than double boiler method when there are plenty of children around.
The main thing to be weary of is overdoing the melting process.


Ingredients

  • 400 grams [14.5 oz] bag of dried fruit pieces
    •  These may be in the form of Dried mango, peach, guava, pineapple, apple or even banana chips.
  • about 1/3 rd a cup of dark chocolate drops.
  • about 1/3rd a cup of white chocolate drops.
Method


  1. Cover the work area first.  Lay down some grease proof paper.
  2. Into a microwave bowl place the white or brown chocolate pieces
  3. Melt the chocolate for 30 seconds .
  4. Stir.
  5. Melt again.
  6. Stir...
  7. When the Chocolate has melted enough dip the fruit pieces into the chocolate.
    1. Best done with a small pair of tongs or the children's fingers may find the chocolate hot to touch.
  8. Lay each piece of fruit out onto the wax paper.
  9. Allow to set.
  10. Use cellophane to wrap each piece up with.
  11. Place each piece into what ever you are going to use as a gift basket.


Similar Posts


Contact cve4me for ongoing reviews and updates.

References

Encouraged to be written by Clear Vision Enterprises .. cve4me@gmail.com, twitter: cve4mejournal, LinkedIn : cve4me

Marshmallow bunnies


A few years ago a friend made some children I know bunnies similar to these.    The children enjoyed receiving them. A major challenge with these bunnies was to then get the children eating them.  Most thought that they wanted to save them for later. Sometimes they actually got the bunnies home.  Other times there was no way that was going to happen.

Ingredients

  • Marshmallows.
  • Scissors
  • Tooth pick
  • Food Colouring
  • A little icing sugar if needed.
Method


  1. Hold the marshmallow in your fingers so that while you are using the scissors the Marshmallow will have less chance of moving.
  2. To make the ears:
    1. Using the scissors make a diagonal cut towards the rim edge of the Marshmallow .
    2. Stop before you get too near the top end of the Marshmallow.
    3. Gently lift the corner that you have snipped.
    4. Now snip along the middle of this piece. 
    5. Rub a little of icing sugar between your fingers.
    6. Separate the ears and angle them both outwards.
  3. To make the tail.
    1. Starting at the point of the first cut you made for the ears.
    2. Snip down towards the back [away from the face direction] until you are about half way down the back of the Marshmallow. 
    3. Pinch the end of this segment so that a cute little tail is made.
  4. For the bunnies face [ and feet]
    1. Starting about midway between the face and the where the front feet will be - snip about 0.7 cm [1/4 inch] towards the middle /bottom part of the body.
    2. The upper side of the cut has become the lower jaw line of the face.
    3. Snip the flap of the marshmallow in half. 
      1. There are you two front feet.
  5. Using a toothpick and a little food colouring - dip the end of the tooth pick into the dye.
    1.  'Paint' a face on the bunny.

Similar Posts


Contact cve4me for ongoing reviews and updates.

References


Fluffier Bunnies

Altered by Clear Vision Enterprises .. cve4me@gmail.com, twitter: cve4mejournal, LinkedIn : cve4me

Friday, August 19, 2011

Blood red cookies and cream


Ingredients

For the Cookies:

  • 1 ounce chocolate, chopped
  • 1/2 ounce milk chocolate, chopped
  • 12 tablespoons unsalted butter melted
  • 1/2 cup sour cream
  • 2 large eggs
  • 1 1/2 teaspoons apple cider vinegar
  • 1/2 teaspoon Vanilla Extract
  • 1 tablespoon red food colouring
  • 2 1/4 cups all- purpose flour
  • 1 cup caster sugar
  • 1/4 cup unsweetened cocoa powder
  • 2 teaspoons baking powder
  • 1/4 teaspoon baking soda
  • 1/2 teaspoon salt

For the Filling:

  • 250 grams [8 ounces] cream cheese, at room temperature
  • 3 tablespoons unsalted butter, at room temperature
  • 2 1/2 cups icing sugar, sifted
  • 1 vanilla bean, halved lengthwise and seeds scraped

Directions

Make the cookies:
  1. Preheat the oven to 190 deg Cel [375 degrees F]. 
  2. Line 2 large baking sheets with parchment paper.
  3.  Combine the semisweet and milk chocolate in a microwave-safe bowl and microwave at 50 percent power until melted, about 2 minutes. 
  4. Whisk until smooth.
  5. Whisk the melted butter, sour cream, eggs, vinegar, vanilla and food coloring in a bowl until combined. In another bowl, whisk the flour, sugar, cocoa powder, baking powder, baking soda and salt.
  6. Add the flour mixture to the butter mixture in four equal batches, whisking each batch completely before adding the next. 
  7. Stir in the melted chocolate.
  8. Scoop heaping tablespoonfuls of batter onto the prepared baking sheets and smooth the tops with a damp finger. 
  9. Bake until the cookies spring back when lightly pressed, 8 to 10 minutes. 
  10. Let cool 10 minutes on the baking sheets, then transfer to racks to cool completely.
To make the filling: 
  1. Into a pan place 50 g of ice cream topping, 1 tbsp strawberry jam and 1 tsp of corn syrup.
  2. Gently warm and combine these ingredients.
    1. Set aside to cool.
  3. Beat the cream cheese and butter with a mixer until smooth.
  4.  Beat in the icing sugar and vanilla seeds. 
  5. Sandwich a tablespoonful of filling between 2 cookies.
  6. Make a hollow in the middle of the sour cream.
  7. Place a mix of strawberry jam, ice cream topping
  8. Repeat with the remaining cookies and filling.
  9. Refrigerate 30 minutes before serving.


Encouraged to be written by Clear Vision Enterprises .. cve4me@gmail.com, twitter: cve4mejournal, LinkedIn : cve4me

Thursday, August 18, 2011

A D-G dip


  • A plain sour-cream based chip or vegetable dip
  • a few drops of green food coloring 
  • Capsicum or bell pepper
Method
Add a few drops of food colouring to the dip.
Scatter small bits of the red and yellow capsicum or bell pepper across the top.


Encouraged to be written by Clear Vision Enterprises .. cve4me@gmail.com, twitter: cve4mejournal, LinkedIn : cve4me

Brain Cell Salad


Ingredients
  • 1 pk 200 g(6 oz) blueberry jelly mix
  • 1 ct   500 (16 oz) small curd cottage cheese
  • 1 cn  750 g (16 1/2oz) can blueberries In syrup
    •  3/4 c Frozen blueberries, thawed
  • Blue food coloring

Tools:

  • 2 Mixing bowls
  • cn Opener
  • Spoon
  • 6 Salad plates

Method
  1. Prepare jelly according to package directions.
  2.  Chill 4-5 hours or until firm.
  3. Scoop cottage cheese into a bowl. 
  4. Drain and set aside the syrup from the blueberries. 
  5. Add the berries to the cottage cheese and mix well. 
  6. Add three drops of food coloring to turn the corrage cheese a nice grayish color with blended.
  7. To serve salad, place a few spoonfuls of firm gelatin, (congealed brain fluid), onto individual serving plates. 
    1. Top with a scoop of cottage cheese (brain tissue) mixture and serve. 
    2. Serves 6.


Altered by Clear Vision Enterprises .. cve4me@gmail.com, twitter: cve4mejournal, LinkedIn : cve4me


Reference  - Just Kids Recipes

Wednesday, August 17, 2011

Cone Ice cream hat


  • Dark biscuit
  • Ice cream cone
  • Ice cream
  • Melted chocolate
  1. Fill ice cream cone with ice cream. 
  2. Place biscuit on top.
  3. Gently push the biscuit on to the rim of the ie cream cone.
  4. Give the biscuit a quick dunk into the melted chocolate or dark icing sugar that suits the occasion.
Uses... witches hat, space rocket penquin island


Encouraged to be written by Clear Vision Enterprises .. cve4me@gmail.com, twitter: cve4mejournal, LinkedIn : cve4me

Gory Hand


Besides being able to eat the hand this is a great decoration to scare your friends. Other hands are inedible while making terrific table and room decorations.

  1. Make a strong cherry or other red Jelly by using 3/4 of the recommended amount of water.
   2.     Hang a clean rubber glove over the sink by using clothes pins attached to thin 
strips of wood. 
           - If the glove has a fur like lining turn the glove inside out ... especially if the end result hand is to go into liquid as a display / ice cube. 
  3.      When the jello has cooled pour into glove and place in the deep freeze. 
  4.     Be careful not to have the hand pressing against anything or it will ruin the shape. 
  5.     When the Jelly is frozen cut the glove off using small scissors. 
  6.    Keep your masterpiece in the fridge until ready to display. 
        -Or place the hand inside the wacky witches brew.


Altered by Clear Vision Enterprises .. cve4me@gmail.com, twitter: cve4mejournal, LinkedIn : cve4me

Monday, August 15, 2011

Its red!


Rigatoni With Ricotta and Roasted Beets

Ingredients
4 beets 330 gram (about 3/4 pound), peeled and cut into 1/2-inch pieces
3 tablespoons extra-virgin olive oil
Salt and pepper
1/2 red onion, thinly sliced
1 pound rigatoni pasta
5 cups baby spinach (about 8 ounces)
1 cup ricotta cheese
Grated peel from 1 lemon, plus 3 tablespoons lemon juice
Directions
  1. Preheat the oven to 450°.
  2. On a foil-lined baking sheet, toss the beets with 1 tablespoon olive oil; season with salt and pepper. Wrap tightly with foil and roast for 15 minutes.
  3. Unwrap, then arrange the beets in a single layer.
  4. In a small bowl, toss the onion with 1 tablespoon olive oil and season with salt and pepper; arrange on the baking sheet. Roast, tossing halfway through, until tender, 8 to 10 minutes.
  5. Meanwhile, bring a large pot of salted water to a boil. Add the rigatoni and cook until al dente.
  6. Drain, reserving 1/2 cup pasta cooking water. Return the pasta to the pot and toss with the spinach.
  7. In a bowl, whisk the ricotta, reserved pasta water, lemon peel, lemon juice and the remaining 1 tablespoon olive oil. Add to the pasta along with the vegetables. Season with salt and pepper; toss.
Serves 4.


Similar Posts


Contact cve4me for ongoing reviews and updates.

References
Altered by written by Clear Vision Enterprises .. cve4me@gmail.com, twitter: cve4mejournal, LinkedIn : cve4me

Chuckie's Upchuck


Ingredients
  • 2 teaspoons of butter or margarine
  • 2 medium onions chopped
  • 475 gram [16 ounces] of cream style corn
  • 2- 275 gram [10 ounce] cans of cream of mushroom soup
  • 2 cups milk
Method

  1. Whatever leftover vegetables you have in the fridge! (tomatoes, green beans, Mushrooms, cauliflower, etc)
  2. Saute onions in the butter. 
  3. Add everything else and bring it to a boil. 
  4. Simmer 5 minutes. 
  5. Serve immediately with a barf bag of course!


Altered by Clear Vision Enterprises .. cve4me@gmail.com, twitter: cve4mejournal, LinkedIn : cve4me

Reference Just Kids Recipes

Saturday, August 13, 2011

Cookie Spiders


Ingredients
  • black or chocolate licorice twists 
  • fudge sandwich cookies 
  • chocolate frosting 
  • red cinnamon candies or mini M&Ms
Method

  1. Cut licorice in half. 
  2. Remove the top of each sandwich cookie; press 8 licorice pieces into the fudge center to resemble spider legs.
  3.  Spread a little chocolate frosting over the licorice; replace cookie tops. 
  4. Frost the tops of the spider cookies with frosting. 
  5. Place red cinnamon candies or mini M&Ms on top for eyes.


Encouraged to be written by Clear Vision Enterprises .. cve4me@gmail.com, twitter: cve4mejournal, LinkedIn : cve4me

Friday, August 12, 2011

Honey Biscuits

Ingredients

  • 175 g unsalted butter - chopped
  • 1 cup caster sugar
  • /4 cup honey
  • 1/4 tsp ground cinnamon
  • 1 egg - lightly beaten.
  • 1 tsp vanilla extract
  • 2  1/4 cups self - raising flour
  • milk to serve -optional.
Directions
  1. Stir butter, sugar, honey and cinnamon in a medium sauce pan over a low heat - tiol butter has melted and mixture is smooth.
  2. Remove from heat.
  3. transfer the hot mix to a large bowl.
  4. Cool to room temperature.
  5. Stir egg, vanilla extract and flour into mixture.
  6. Roll tbsp of mixture into balls
  7. Place, about 4 cm apart, on two oven trays lined with baking paper.
  8. Flatten slightly with a fork.
  9. Cook in two batches, in a moderate oven 9180 deg C for 12 min [until golden brown]
  10. Cool on trays
  11. Serve biscuits with milk.


Encouraged to be written by Clear Vision Enterprises .. cve4me@gmail.com, twitter: cve4mejournal, LinkedIn : cve4me

Teddy Bear Biscuits

Ingredients:

  • 250g unsalted butter - at room temperature, chopped.
  • 1 cup caster sugar
  • 2 eggs
  • 2/3 cup desiccated coconut
  • 3 cup self-raising flour
  • 2 tbsp cocoa power, sifted
  • 1/4 cup dark chocolate melts, melted
  • Mini M&M's to decorate with.
Directions
  1. Beat butter and sugar until light and fluffy.
  2. Add eggs 
    1.  one at a time- 
    2. beat until combined.
  3. Stir in coconut and flour to form a smooth dough.
  4. Divide dough in half.
  5. Add chocolate powder to one half of the dough mixture..
    1. knead until chocolate is mixed through.
  6. To make bear heads 
    1. roll 14 level tbsp of chocolate dough into balls.
    2. place 6 cm apart on the oven trays.
    3. Using your hands gently push the heads sown to flatten the balls slightly.
  7. To make bear bodies 
    1. Press down gently to flatten bodies.Chocolate Teddy Bear Cookies
    2. roll 14 level tbap of chocolate dough into balls.
    3. Place against heads.
  8. To make arms and legs
    1. Roll 56 level tsp into balls.
    2. Place against bodies.
    3. press to flatten slightly.
  9. To make ears
    1. Roll 28 level tsp into balls.
    2. Place against he head .
  10. Cook biscuits one tray at the time.
    1. moderate oven [180 deg Cel] for about 15 to 20 minutes.
  11. Cool bears on tray.
  12. Decorate
    1. Pour dark chocolate into a small snap lock bag.
      1. squeeze into one courner, twist bag and make a small snip.
      2. Attach mini M&M's with melted chocolate to represent the eyes.
      3. Pipe on choclate nose and mout.
  13. Put aside to set.
  14. Biscuits can be made up to three days before ifr they are stored in an air tight container.


Encouraged to be written by Clear Vision Enterprises .. cve4me@gmail.com, twitter: cve4mejournal, LinkedIn : cve4me